


Babylon's innovative protocols aim to leverage Bitcoin's security to enhance the decentralized economy. It focuses on unlocking the potential of the 21 million bitcoins for securing Proof-of-Stake (PoS) chains and decentralized apps (Dapps) through a trustless, secure, and fast Bitcoin Staking Protocol. This protocol allows bitcoin holders to stake their bitcoins without the need for third-party custody, bridging, or wrapping, offering a scalable and modular solution for enhancing PoS security.
As of December 2023, Babylon project closed its $18 million funding round, which led jointly by Polychain Capital and Hack VC, along with contributions from several notable investors including Framework Ventures and Polygon Ventures, aims to enhance Babylon's protocol. This protocol uniquely transforms Bitcoin into a decentralized, trustless staking asset for the Proof-of-Stake (PoS) economy.
You can find their official docs here: Babylon's Official Documentation
System Specifications
As per Babylon, this system spec has been tested by validators and found to be comfortable:
Quad Core or larger AMD or Intel (amd64) CPU
32GB RAM
1TB NVMe Storage
100MBps bidirectional internet connection
You can run Babylon on lower-spec hardware for each component, but you may find that it is not highly performant or prone to crashing.
As for me, I opted for the minimum specs applicable. I just make sure that there are no other projects running in this server.
2 vCPUs
2 GB Memory
60GB NVMe
4TB Bandwidth
Choose and Configure your VPS
You have the option to set up your node by configuring it on a personal computer or by utilizing a Virtual Private Server (VPS). A VPS is particularly suitable for handling websites, applications, or various online services, including nodes.
For all my VPS needs, I always use Vultr. It provides a robust and user-friendly platform with global data centers, fast SSD storage, and flexible deployment options to meet your specific needs, making it a top choice for businesses and developers alike.
I also like that they charge by the hour, it is ideal for users with fluctuating demands or short-term projects, as you only pay for the exact hours you use. It allows users to quickly test new configurations or projects without a long-term financial commitment, minimizing upfront costs.
Start your Vultr journey here.
Choosing a Server Type and select Cloud Compute

CPU & Storage Technology select AMD High Performance

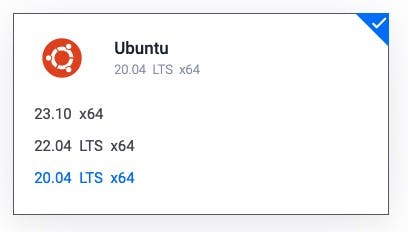
Server Image select Ubuntu 20.04 LTS x64
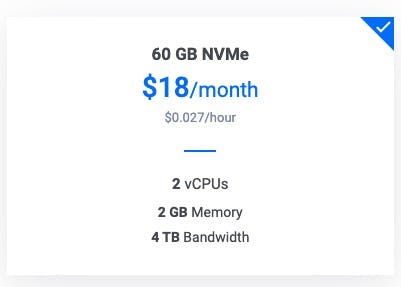
Server Size select 60 GB NVMe at 18USD per month
You can also opt out of enabling Auto Backups if you want to save money.
Add a Server Hostname and Label. You can update this later too.
Connecting to Your Server
I am using Mac so I am using Mac's native terminal.
Here's a guide on how to use Putty on Windows to connect to Vultr. This can also be used as a guide to connect to any VPS provider.
Getting Started
This guide will instruct you on running a node for bbn-test-2 .
Setting up your server
We need to first install essential components.
sudo apt update
sudo apt -qy install curl git jq lz4 build-essential
sudo apt upgrade -y
Install Golang
Babylon requires Golang for Babylon to be installed on your system.
sudo rm -rf /usr/local/go
curl -Ls https://go.dev/dl/go1.20.14.linux-amd64.tar.gz | sudo tar -xzf - -C /usr/local
eval $(echo 'export PATH=$PATH:/usr/local/go/bin' | sudo tee /etc/profile.d/golang.sh)
eval $(echo 'export PATH=$PATH:$HOME/go/bin' | tee -a $HOME/.profile)
After you install Golang, you can verify that you have the proper version by running:
go version
You will see something like this:

Downloading and build binaries
You need to clone Babylon’s GitHub repository to install the babylond executable.
cd $HOME
rm -rf babylon
git clone https://github.com/babylonchain/babylon.git
cd babylon
git checkout v0.7.2
We are now going to build our binaries.
make build
Next step is we need to prepare binaries for Cosmovisor.
mkdir -p $HOME/.babylond/cosmovisor/genesis/bin
mv build/babylond $HOME/.babylond/cosmovisor/genesis/bin/
rm -rf build
Then, we need to create our application symlinks.
sudo ln -s $HOME/.babylond/cosmovisor/genesis $HOME/.babylond/cosmovisor/current -f
sudo ln -s $HOME/.babylond/cosmovisor/current/bin/babylond /usr/local/bin/babylond -f
Install Cosmovisor and create a service
We will use the Golang app that we installed earlier to download and install Cosmovisor.
go install cosmossdk.io/tools/cosmovisor/cmd/cosmovisor@v1.5.0
And then we need to create our babylon.service
Important Note: Make sure you copy it as indicated here and paste it as is in your terminal. DO NOT EDIT ANYTHING HERE.
sudo tee /etc/systemd/system/babylon.service > /dev/null << EOF
[Unit]
Description=babylon node service
After=network-online.target

[Service]
User=$USER
ExecStart=$(which cosmovisor) run start
Restart=on-failure
RestartSec=10
LimitNOFILE=65535
Environment="DAEMON_HOME=$HOME/.babylond"
Environment="DAEMON_NAME=babylond"
Environment="UNSAFE_SKIP_BACKUP=true"
Environment="PATH=/usr/local/sbin:/usr/local/bin:/usr/sbin:/usr/bin:/sbin:/bin:/usr/games:/usr/local/games:/snap/bin:$HOME/.babylond/cosmovisor/current/bin"

[Install]
WantedBy=multi-user.target
EOF
Once we have created our service, we need to reload and enable our babylon.service
sudo systemctl daemon-reload
sudo systemctl enable babylon.service
Setting up our Node
Learn how to set up a node for the Babylon system.
Set the node configuration
We are going to set the values for our chain-idkeyring-backend and node
babylond config chain-id bbn-test-2
babylond config keyring-backend test
babylond config node tcp://localhost:16457
Setup your Node name
MONIKER="YOUR_PREFERRED_MONIKER_GOES_HERE"
Initialize the Node
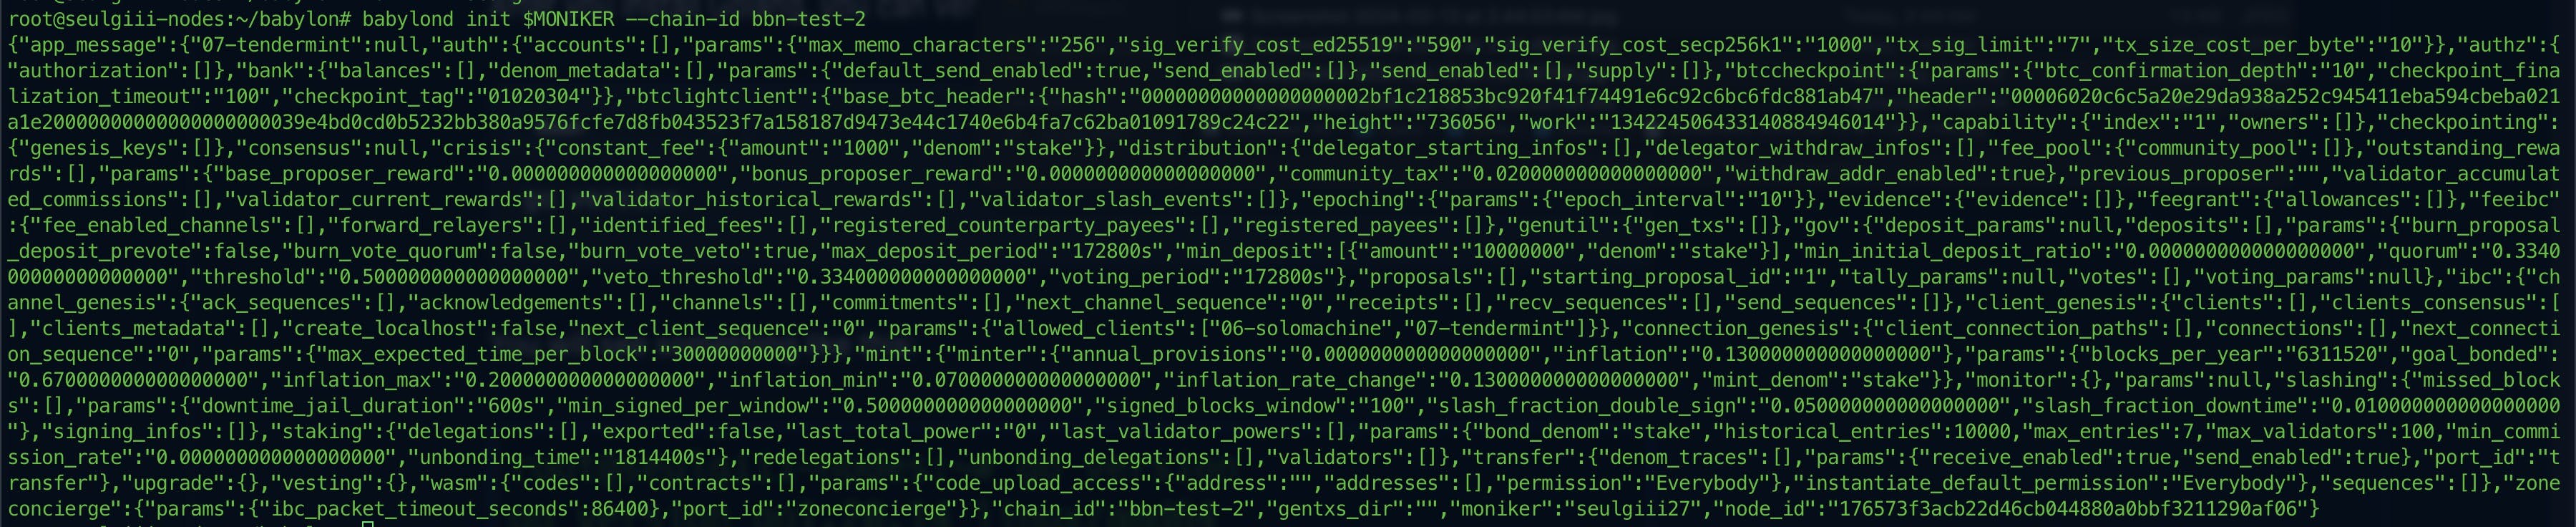
babylond init $MONIKER --chain-id bbn-test-2
You will see something like this:
Then, retrieve the genesis file and place it in the node directory.
curl -Ls https://snapshots.kjnodes.com/babylon-testnet/genesis.json > $HOME/.babylond/config/genesis.json
curl -Ls https://snapshots.kjnodes.com/babylon-testnet/addrbook.json > $HOME/.babylond/config/addrbook.json
Adding Seeds and Peers
We need to add our seeds and minimum-gas-prices attributes to contain appropriate values.
sed -i -e "s|^seeds *=.*|seeds = \"3f472746f46493309650e5a033076689996c8881@babylon-testnet.rpc.kjnodes.com:16459\"|" $HOME/.babylond/config/config.toml
sed -i -e "s|^minimum-gas-prices *=.*|minimum-gas-prices = \"0.00001ubbn\"|" $HOME/.babylond/config/app.toml
We need to set pruning values as well.
sed -i \
  -e 's|^pruning *=.*|pruning = "custom"|' \
  -e 's|^pruning-keep-recent *=.*|pruning-keep-recent = "100"|' \
  -e 's|^pruning-keep-every *=.*|pruning-keep-every = "0"|' \
  -e 's|^pruning-interval *=.*|pruning-interval = "19"|' \
  $HOME/.babylond/config/app.toml
Set custom ports as well.
sed -i -e "s%^proxy_app = \"tcp://127.0.0.1:26658\"%proxy_app = \"tcp://127.0.0.1:16458\"%; s%^laddr = \"tcp://127.0.0.1:26657\"%laddr = \"tcp://127.0.0.1:16457\"%; s%^pprof_laddr = \"localhost:6060\"%pprof_laddr = \"localhost:16460\"%; s%^laddr = \"tcp://0.0.0.0:26656\"%laddr = \"tcp://0.0.0.0:16456\"%; s%^prometheus_listen_addr = \":26660\"%prometheus_listen_addr = \":16466\"%" $HOME/.babylond/config/config.toml
sed -i -e "s%^address = \"tcp://localhost:1317\"%address = \"tcp://0.0.0.0:16417\"%; s%^address = \":8080\"%address = \":16480\"%; s%^address = \"localhost:9090\"%address = \"0.0.0.0:16490\"%; s%^address = \"localhost:9091\"%address = \"0.0.0.0:16491\"%; s%:8545%:16445%; s%:8546%:16446%; s%:6065%:16465%" $HOME/.babylond/config/app.toml
Download the Latest Chain Snapshot
curl -L https://snapshots.kjnodes.com/babylon-testnet/snapshot_latest.tar.lz4 | tar -Ilz4 -xf - -C $HOME/.babylond
[[ -f $HOME/.babylond/data/upgrade-info.json ]] && cp $HOME/.babylond/data/upgrade-info.json $HOME/.babylond/cosmovisor/genesis/upgrade-info.json
Now we just need to start babylon and check our logs.
sudo systemctl start babylon.service && sudo journalctl -u babylon.service -f --no-hostname -o cat
You will see something like this:

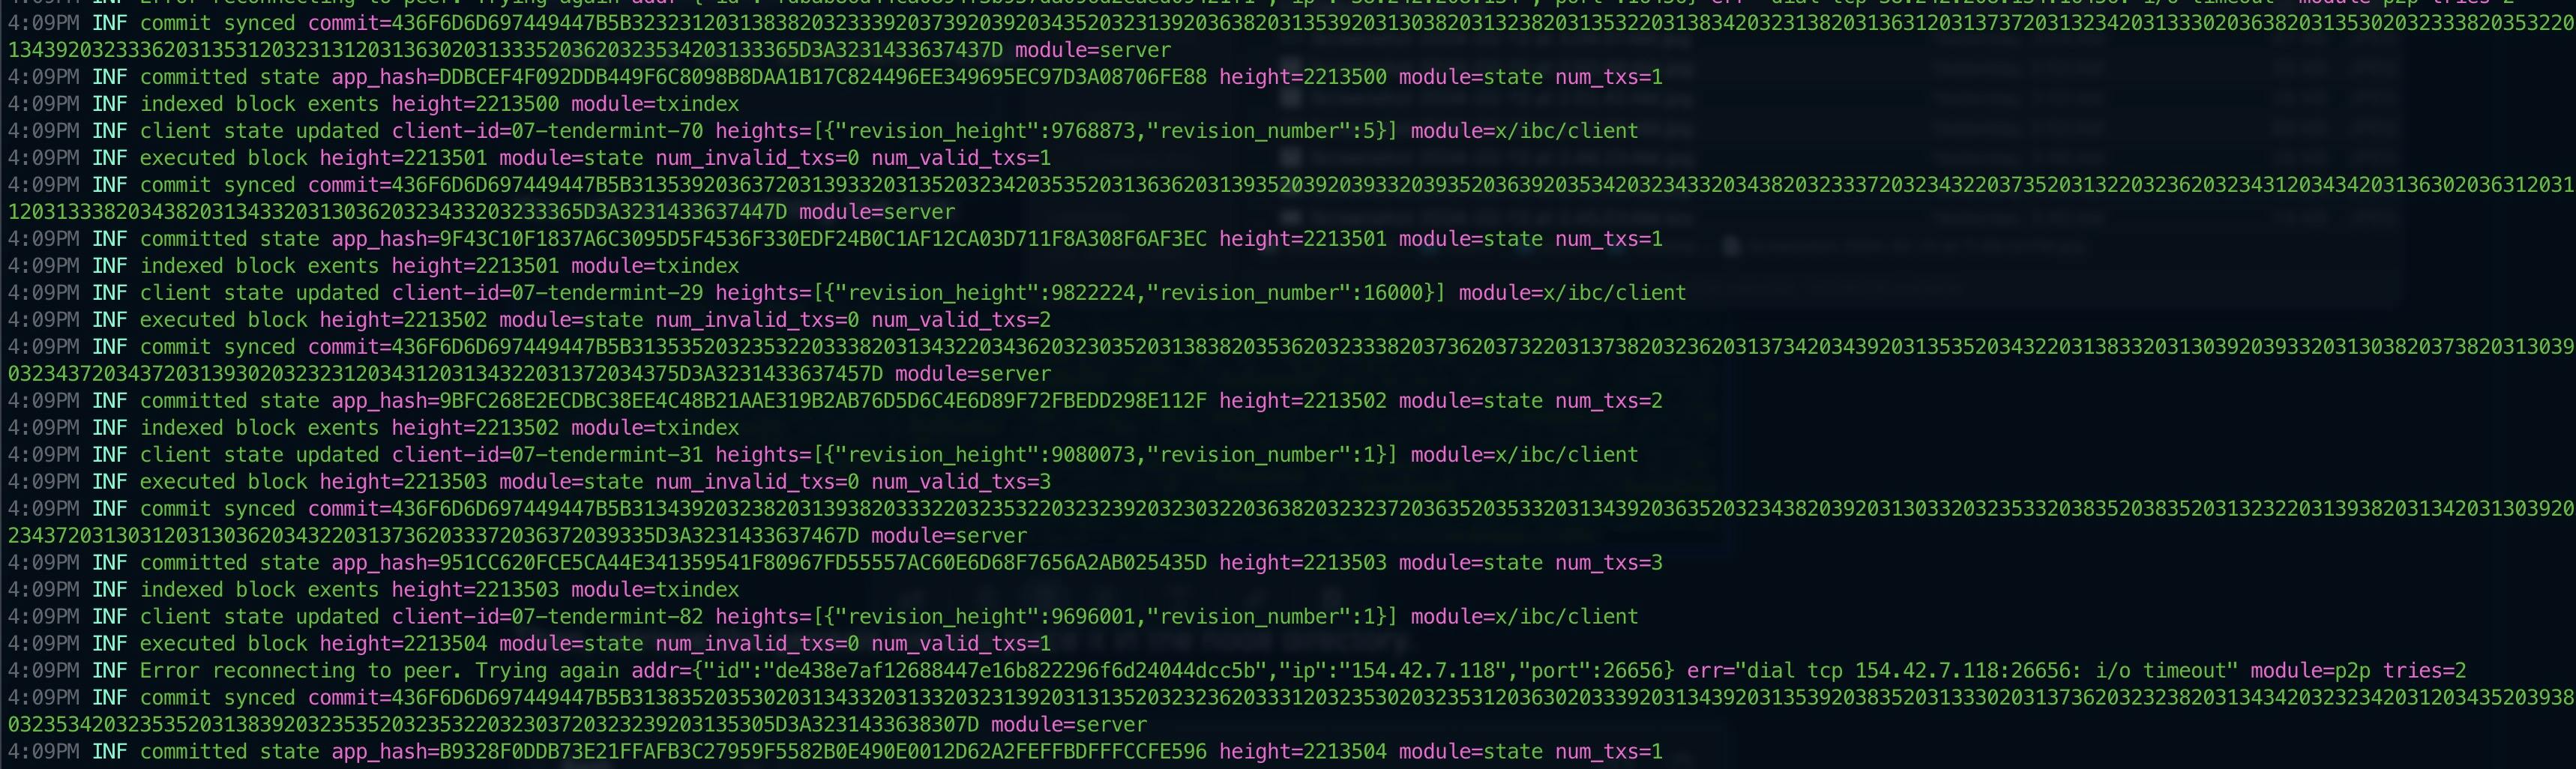
If you see words like committed state, commit synced, executed block, etc, that means your node is running properly.
Becoming a Validator
Validators are required to have funds for two reasons:
They need to provide a self delegation
They need to pay for transaction fees for submitting BLS signature transactions
test keyring backend. In the future, Babylon will support other types of encrypted backends provided by the Cosmos SDK for validators.Add New Key
Then we need to execute the create wallet command.
YOUR_PREFERRED_WALLET_NAMEis a wallet name of your choosing
babylond keys add YOUR_PREFERRED_WALLET_NAME
Requesting for funds
This can be accomplished by going to the #faucet channel of official Discord Server to request funds by providing the address you created before. After joining the channel, users send a request starting with !faucet followed by the request address. For example, !faucet bbn1sajf5fd7tyjt0jjy6lqzahy09jl2nkcnx5qm06
Create a BLS Key
Using the address that you created on the previous step.
Note: You need to replace the value of YOUR_PREFERRED_WALLET_NAME
babylond create-bls-key $(babylond keys show YOUR_PREFERRED_WALLET_NAME -a)
This command will create a BLS key and add it to the $HOME/.babylond/config/priv_validator_key.json. This is the same file that stores the private key that the validator uses to sign blocks. Please ensure that this file is secured properly.
After creating a BLS key, you need to restart your node to load this key into memory.
sudo systemctl restart babylon.service
Modify Configuration
Furthermore, you need to specify the name of the key that the validator will be using to submit BLS signature transactions under the $HOME/.babylond/config/app.toml file. Edit this file and set the key name to the one that holds funds on your keyring:
sed -i -e "s|^key-name *=.*|key-name = \"wallet\"|" $HOME/.babylond/config/app.toml
Finally, it is strongly recommended to modify the timeout_commit value under $HOME/.babylond/config/config.toml. This value specifies how long a validator will wait before commiting a block before starting on a new height. Given that Babylon aims to have a 10 second time between blocks, set this value to:
sed -i -e "s|^timeout_commit *=.*|timeout_commit = \"10s\"|" $HOME/.babylond/config/config.toml
Create the Validator
Validators for Babylon is created through the babylond tx checkpointing create-validator command. This command expects that a BLS validator key exists under the $HOME/.babylond/config/priv_validator_key.json.
100ubbn. Therefore, it is important that validators maintain enough unbonded funds in their keyring to pay for those transaction fees.ubbn tokens bonded than the last validator ordered by the tokens bonded (or the validator set to not be full) as well as have at least 10000000ubbn bonded.--moniker--identity--details and --website values to YOUR OWN PREFERRED VALUES.--monikerThis should not be blank and should be the same as the Moniker value you set in the initial steps.--identitythis is your Keybase ID. If you do not have one, leave it as blank or ""--detailsa short description/bio that you like. If you don't want to add anything, leave it as blank or ""--websiteif you have your own validator website. If not, you can put in your social media profile link here like Twitter. Should not be left blank as per my experience
Note: You can copy the whole code block below and paste it in your terminal.
babylond tx staking create-validator \
--amount 1000000ubbn \
--pubkey $(babylond tendermint show-validator) \
--moniker "YOUR_PREFERRED_MONIKER_NAME" \
--identity "YOUR_KEYBASE_ID" \
--details "YOUR_PREFERRED_DETAILS" \
--website "YOUR_WEBSITE_URL" \
--chain-id bbn-test-2 \
--commission-rate 0.05 \
--commission-max-rate 0.20 \
--commission-max-change-rate 0.01 \
--min-self-delegation 1 \
--from wallet \
--gas-adjustment 1.4 \
--gas auto \
--gas-prices 0.00001ubbn \
-y
Congrats! You are now a validator on the Babylon system.